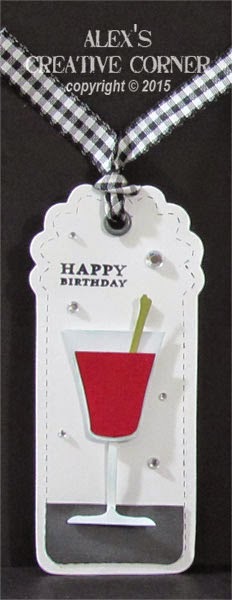
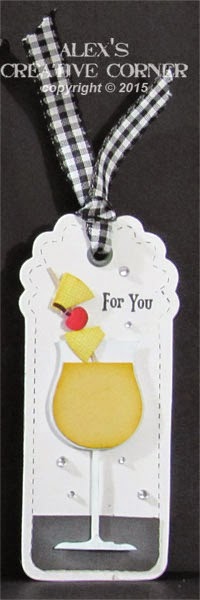
February is a busy birthday month for us. First up is my sister, late in the month my dad and in between a few friends.
My sister is a bit of a party girl so I thought this years card should reflect that a little.
I came up with several cute cocktails that I am using on her gift tags as well as the card; a matching set so to speak. I will share a tag each day this week, followed by the card on Friday.
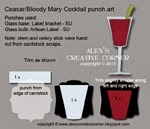
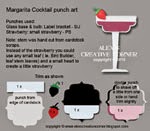
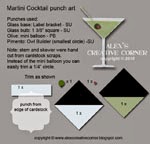
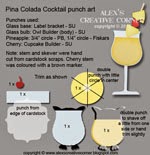
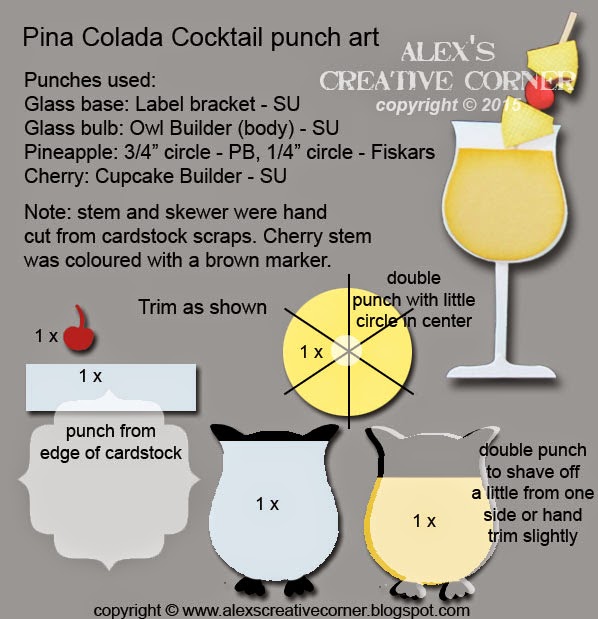
Up first one of my favourites, the Pina Colada (or if you don't like rum and prefer vodka, a Chi-Chi).
I wasn't sure if I liked the white glass so I tried it with vellum, which was too milky. Then I opted for window sheet. A little harder to punch and just awful to glue. Looked like a mess no matter how careful I was with my Mono Multi. So white glasses it is.
I opted for a simple white background but then inked the edges of the glass with a little light blue to help it pop from the background a little. Everything is glued on top of the glass to try and give a bit of an illusion that there is glass, somewhere.
I also popped my glass using foam mount. Note I trimmed it into very thin strips so that there is a little behind the base as well as the stem.
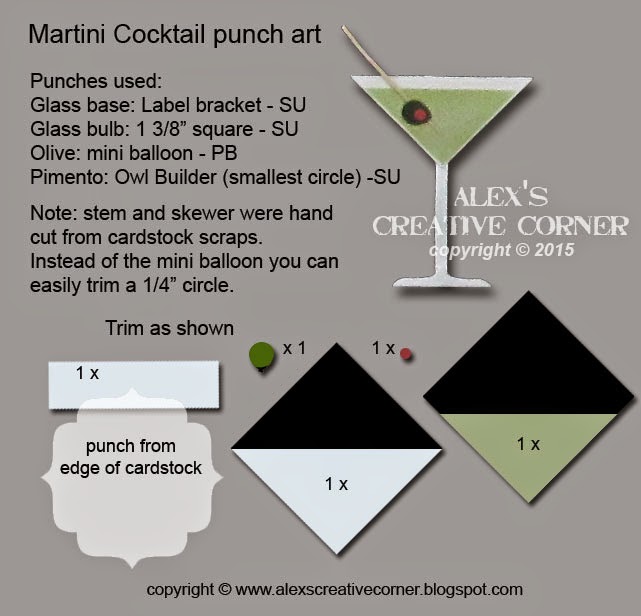
Supplies used:
Cardstock: Bazzill
Ink: So Safron, Crushed Curry, Cherry Cobbler, Soft Sky, Basic Gray, Basic Black - all SU
Die: Two Tags - SU
Stamp: Vintage frames - SU
Misc.: foam mounting tape, 1/4" dark gray eyelet. 3 sizes of rhinestones (1/16", 1/8" 3/16"), 3/8" black gingham ribbon
Full punch art instructions below
Thanks for stopping by, check back tomorrow for another fun cocktail tag.